

Key Takeaways
Why Gallery Walls Go Wrong - and How to Prevent It
Gallery walls fail for one of two reasons: frames hung too far apart (the "shotgun blast" look) or crammed so tightly they lose individuality. The fix is planning the arrangement before anything touches the wall. If you're newer to decorating decisions in general, our guide for new homeowners covers how to sequence these kinds of choices within a broader room plan.
The most common mistake is working piece by piece, hanging one frame and then eyeballing the next. Instead, treat the wall as a canvas and your collection as a single composition. That mindset shift - from individual objects to a unified arrangement - is what separates a purposeful gallery wall from a cluttered one.
Before you start, take a photograph of the blank wall and print or sketch it at rough scale. This gives you a reference to annotate as your layout evolves.
What you will need
Tools and Materials You'll Need
You don't need specialized equipment for this project - only what you likely already have or can pick up inexpensively. Having everything gathered before you begin keeps the process from stalling mid-hang.
Hammer
Drives picture-hanging nails into drywall or plaster walls.
Picture-hanging nails or hooks
Supports the weight of framed artwork on the wall.
Small bubble level
Ensures each frame hangs straight and level after placement.
Pencil
Marks nail positions on the wall before driving hardware.
Painter's tape
Holds paper templates to the wall during layout planning without damaging paint.
Craft paper or newspaper
Used to create templates of each frame for layout planning before nailing.
Tape measure
Measures spacing between frames and distance from furniture or ceiling.
Stud and wire finder
Detects wall studs and hidden electrical wires before nailing into the wall.
If you're in a rental and concerned about wall damage, check our rental-friendly decorating ideas - adhesive strip hangers rated for the weight of your frames may be a suitable alternative to nails in some situations, though they have weight limits and may not suit heavy frames.
Planning Your Layout with Paper Templates
This is the step most people skip and later regret. Trace each frame onto craft paper or newspaper, cut out the shapes, label them, and tape them to the wall with painter's tape. Step back, live with the arrangement for a day, and adjust freely - no commitment, no holes.
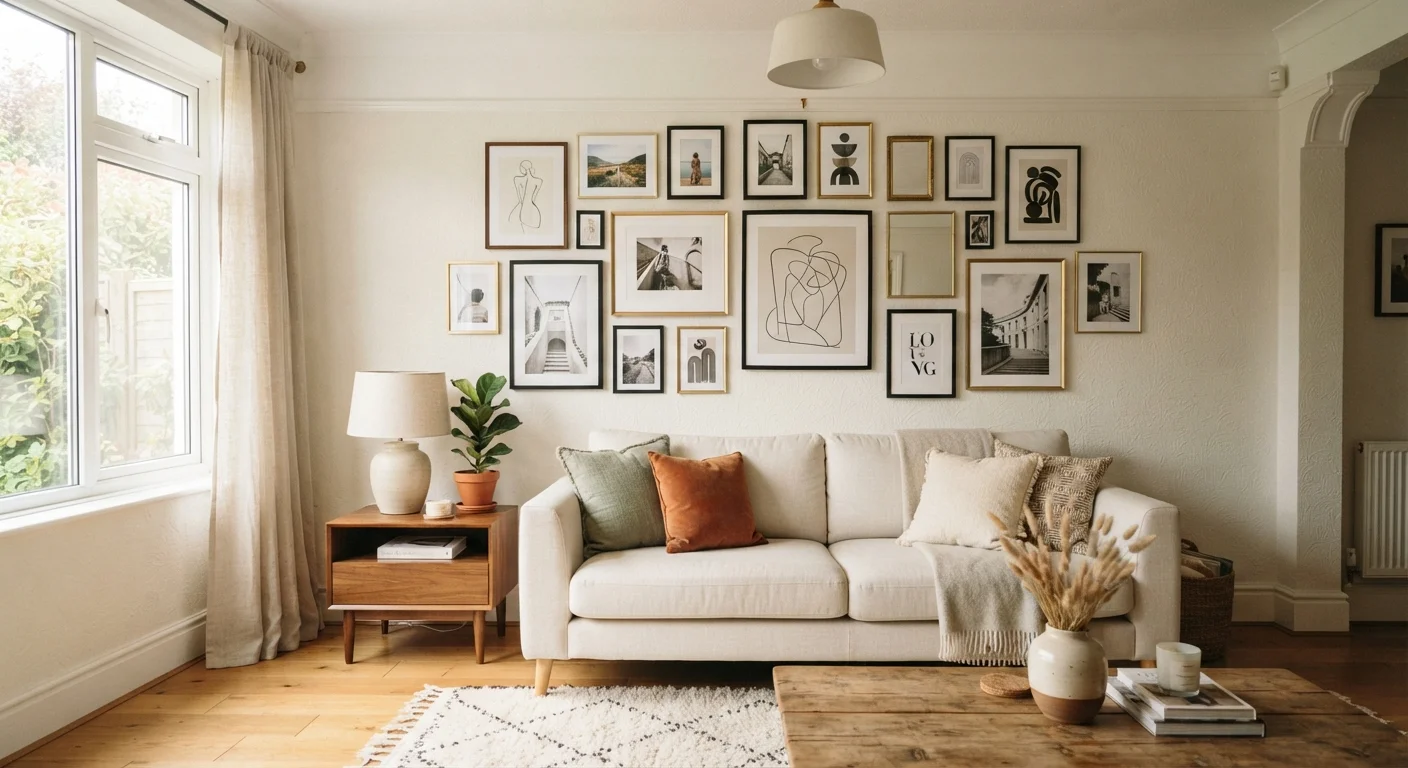
Consider the wall's relationship to the furniture below it. A gallery wall that floats disconnected from the sofa or console beneath it can feel untethered. The bottom edge of your arrangement should typically sit around 8 to 10 inches above the furniture's top surface, and the overall grouping should span roughly two-thirds to three-quarters of the furniture's width. These aren't rigid rules, but they reflect how the eye naturally anchors wall arrangements to the furniture below. For a deeper look at how furniture placement affects the whole room, see this checklist on furniture arrangement.
Gather and Curate Your Frames
Lay all candidate frames on the floor in front of the wall. Edit ruthlessly - a gallery wall with 7 to 12 pieces is manageable for most walls; more than 15 can overwhelm a standard room. Look for a mix of at least two frame sizes (large, medium, small) and consider whether you want matched finishes for a cohesive look or mixed finishes for an eclectic feel. Decide before you hang, not after.
Create and Arrange Paper Templates
Trace each frame onto craft paper or newspaper and cut out the shapes. Label each cutout with the frame's name or a number corresponding to your reference photo. Tape them to the wall using painter's tape. Start with your largest or most dominant piece roughly at eye level (about 57-60 inches from floor to center) and build outward, maintaining 2-3 inches between each piece.
Mark Nail Positions
Once the paper template layout satisfies you, mark the nail position for each piece directly through the paper template. Most frames hang from a wire or a sawtooth bracket; measure from the top of the frame to the hanging hardware and transfer that measurement to find the exact nail point on the paper. Mark with a pencil dot, then remove the templates one at a time as you hang each frame.
Hang Frames and Check Level
Drive nails at marked points at a slight downward angle (about 45 degrees into the wall) for better holding strength in drywall. Hang each frame and check with a small level before moving on. If a frame has two hanging points, use two nails set precisely to match the hardware spacing to prevent tilting.
Step Back and Adjust
Once all frames are hung, step back to the far side of the room and evaluate the overall composition. Minor shifts - nudging a frame half an inch up or tilting it very slightly - can make a meaningful difference. Frames with two hanging points are easy to re-level; single-point hangers may need the nail repositioned if the tilt is significant.
Troubleshooting Common Problems
Even careful planners run into hiccups. Here are the most frequent issues and how to address them:
- Arrangement looks lopsided: Check whether your largest or heaviest-looking piece is centered. Visual weight, not just physical weight, affects balance - dark frames and busy art carry more visual mass than light ones.
- Spacing looks uneven once hung: Use a small piece of cardboard cut to your target gap width as a consistent spacer while marking nail positions.
- Nail is in the wrong spot: Fill small nail holes with spackle, allow to dry, sand lightly, and touch up with matching wall paint. Most holes become invisible.
- Frames won't hang level: Apply a small piece of painter's tape to the wall directly behind the hanging hardware and mark the nail point on the tape before pressing it to the wall - this transfers the mark precisely.
Refresh Without Starting Over
A gallery wall doesn't need to be permanent. Swap one or two pieces seasonally - rotating in a piece of children's art, a new print, or a framed photo - to keep the wall feeling current without re-hanging everything. This also lets you test new additions before fully committing to the arrangement.
A gallery wall is one of the most cost-effective ways to transform a room. If you're balancing decor spending with other household priorities, our budgeting basics hub offers practical frameworks for allocating discretionary spending thoughtfully.