

Key Takeaways
Why Getting the Diagnosis Right Matters
Damp is one of the most misunderstood problems a homeowner can face. Walk into any hardware store and you'll find shelves of damp-proofing paints, sealers, and additives - but applying the wrong product to the wrong type of damp is a waste of time and money, and can even trap moisture, making structural damage worse over time.
The three main categories of indoor moisture problems are condensation, rising damp, and penetrating damp. They look similar on the surface - staining, peeling paint, musty odors - but their causes, locations, and appropriate fixes are entirely different. This guide walks you through how to tell them apart, what physical evidence to look for, and what each type typically requires to resolve.
If you're new to maintaining a home, our introduction to DIY home improvement covers the foundational tools and terminology that will help you follow this diagnostic process with confidence.
Mold Poses Health Risks - Act Carefully
Visible mold growth, particularly large areas of black mold, can affect indoor air quality and may cause respiratory irritation. When inspecting moldy surfaces, wear a dust mask rated for particulates and avoid disturbing large patches. If mold covers an area larger than roughly 10 square feet, or if any household member has asthma or a compromised immune system, consult a professional remediation service rather than attempting DIY removal. This article provides general informational guidance and is not a substitute for professional assessment.
Tools and Preparation Before You Start
Before inspecting your home, gather the right tools to make your investigation systematic. A casual look around won't give you enough information - you need to examine wall surfaces, check moisture levels, and assess external conditions methodically.
Pin-type moisture meter
Measures moisture content in walls to distinguish between surface dampness and deeper saturation.
Flashlight or inspection torch
Illuminates dark corners, under-sink cavities, and roof spaces where damp is easy to miss.
Notepad and pen (or phone for photos)
Records exact locations, heights, and visual evidence for accurate diagnosis and future reference.
Binoculars
Allows safe inspection of roof tiles and upper masonry from ground level without ladder risk.
Hygrometer
Measures indoor relative humidity over time to confirm or rule out condensation as a cause.
Probe thermometer
Identifies cold wall surfaces that are prone to condensation by measuring surface temperature.
What you will need
Step-by-Step: Diagnosing Your Damp Problem
Work through the steps below in order. Each step builds on the last, and completing all of them gives you a reliable picture of which type of damp - or combination - you're dealing with.
Map the Affected Areas
Walk through every room and note exactly where damp signs appear: staining, peeling wallpaper, mold growth, soft plaster, or a musty smell. Note the height on the wall, which side of the wall (interior or exterior-facing), and whether it appears at ceiling level, mid-wall, or close to the floor. Take photos as you go - these will be valuable if you consult a professional later.
Check the Height and Location of Staining
Height is one of the most diagnostic clues:
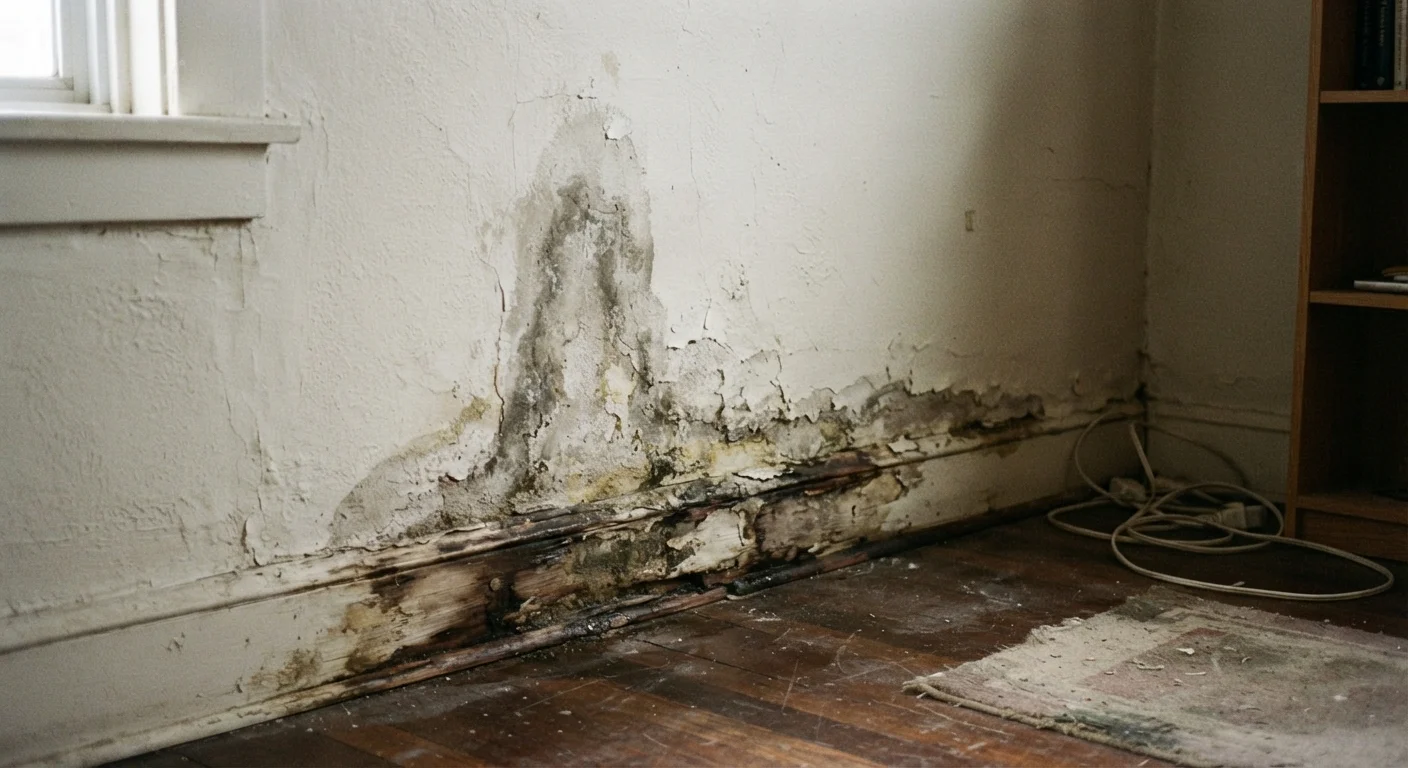
- Staining confined to the lower 3-4 feet of a ground-floor wall - and that rises uniformly around a room regardless of which wall faces outside - suggests rising damp.
- Staining that appears on any wall surface, often at corners or on cold external walls, and is worst in winter - especially in rooms with high moisture output like bathrooms and kitchens - points to condensation.
- Staining that appears in a specific patch linked to an external feature (below a window, near a chimney, below a roof valley) suggests penetrating damp.
Use a Moisture Meter on Suspect Walls
A basic pin-type moisture meter (widely available at hardware stores) gives you an objective reading rather than relying on visual assessment alone. Press the pins firmly against the plaster and record the reading. Test at multiple heights on the same wall - from skirting board level up to about five feet.
- With rising damp, readings will typically be highest near the floor and decrease as you move up the wall.
- With penetrating damp, the highest reading will be concentrated around the point of entry.
- With condensation, surface moisture may be present but sub-surface readings are often lower than with the other two types.
Inspect the Exterior at the Affected Points
Put on appropriate outdoor clothing and examine the outside of the property at every location that showed damp signs internally. Look for:
- Blocked, cracked, or overflowing gutters and downspouts
- Cracked or eroded mortar joints (repointing may be needed)
- Missing, slipped, or cracked roof tiles above the affected area
- Failed caulk or sealant around window and door frames
- Ground level that sits above the damp-proof course line (a visible horizontal joint in brickwork, typically around 6 inches above ground)
If the external inspection reveals clear defects aligned with internal damp patches, penetrating damp is the most likely cause.
Assess Ventilation and Condensation Risk Factors
If your external inspection reveals no obvious defects, or if damp is concentrated in cold corners, on north-facing walls, or around window reveals, evaluate your home's ventilation. Ask yourself:
- Are extractor fans present and working in the bathroom and kitchen?
- Do windows have trickle vents, or are they sealed units with no background ventilation?
- Is there visible mold on window frames or in corners at ceiling height?
- Is condensation regularly visible on windows in the morning?
Affirmative answers to several of these suggest condensation is the primary - or a contributing - factor. This is especially common in well-insulated, draft-proofed homes where air exchange has been reduced without adding mechanical ventilation. Better insulation reduces cold surfaces but must be paired with adequate airflow - see our insulation types guide for more on this balance.
Review Your Findings and Determine Next Steps
Compile your notes, photos, and moisture meter readings. Cross-reference the location, height, and external conditions to reach your diagnosis. If the evidence clearly points to one damp type, you can move forward with the appropriate remedy. If findings are ambiguous - for example, high moisture readings throughout a property with no obvious external cause - consider commissioning an independent damp survey from a qualified surveyor before spending money on treatment.
Be cautious of free damp surveys offered by companies that also sell treatment products; there is an inherent conflict of interest. An independent surveyor provides an unbiased assessment.
Document Everything Before You Repair
Before treating any damp, photograph each affected area from multiple angles and note the date. This baseline record is invaluable for tracking whether a repair has worked, and it provides clear documentation if you later need to make an insurance claim or hire a contractor. Keep these records alongside your home maintenance files.
What to Do After You've Identified the Type
Once you've determined which type of damp you're dealing with, the repair approach becomes much clearer.
- Condensation: Improve ventilation (extractor fans, trickle vents, dehumidifiers), reduce moisture sources (covering pots, drying clothes outdoors where possible), and ensure heating is consistent enough to prevent cold-surface condensation. Anti-mould paint can help as a secondary measure but doesn't address the root cause.
- Rising damp: Typically requires professional intervention to install or repair a damp-proof course (DPC). Injection-based DPC treatments are common in older properties. Replastering with salt-resistant render is usually necessary after treatment, since salts drawn up from the ground remain in existing plaster.
- Penetrating damp: The external defect must be repaired first - gutters cleared and resealed, roofing tiles replaced, masonry repointed, or window seals renewed. Once the entry point is fixed, internal drying and redecoration can begin. Our weekend caulking guide covers how to reseal window frames and other common entry points effectively.
For any damp that has affected wall structure, insulation, or joists, get a qualified surveyor or contractor to assess the extent of damage before starting remediation. You may also find our guide on spotting structural problems before they escalate useful for understanding when professional assessment is essential.
Incorporating routine damp checks into your seasonal upkeep is one of the most effective ways to catch problems early. Our seasonal home maintenance checklist can help you make this a regular habit rather than a reactive scramble. And if you've encountered advice like "paint over it and it'll be fine," our guide to home improvement myths separates the facts from the folklore.